How to Install a WordPress Plugin – Beginner’s Guide for 2020
When you’re just getting into WordPress, one of the first questions you’ll stumble upon is how to install a WordPress plugin? Today, we give you a beginner-friendly answer.
Okay, so the web is full of “get this plugin, get that plugin!” advice when it comes to WordPress.
Plugins indeed are one of the key things that make WordPress awesome, and you certainly shouldn’t avoid new plugins!
However, before you can reap the benefits that some cool plugin brings, you need to have the thing installed. Here’s the easiest way to install a WordPress plugin:
How to install a WordPress plugin that’s free
Note. How to install a WordPress plugin that’s free works a little differently than installing a premium plugin. In this guide, we cover both. Starting with free plugins:
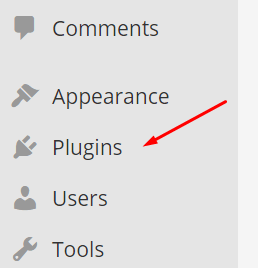
1. Go to “Plugins” in your WordPress dashboard
Start by going to your admin panel – http://your-domain.com/wp-admin/ and click on “Plugins” in the sidebar menu:
2. Click on “Add New”
You can find the “Add New” button near the top of the page:

3. Find your plugin via search
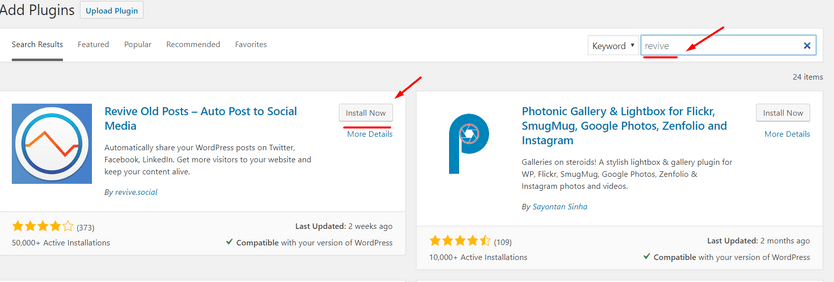
What you’ll see next is a page that shows you a short list of featured/recommended plugins, and a handy search field on the right – this is the one we’re going to use.
Input the name of the plugin that you want to install in that search field. In my case, I’m going to demonstrate how to install our Revive Old Post plugin:

Now, the great thing here is that you don’t even need to input the plugin’s whole name. For example, I’m just going to use “revive” and press the enter key on my keyboard.
4. Install your plugin
Once you see the plugin you’re looking for on the list, all you need to do now is click on the “Install Now” button. When you do that, WordPress is going to fetch the plugin and have it installed on your site. It works much like installing a new app on your phone.
5. Activate the plugin
There’s one final step. When the installation is complete, click on the “Activate Plugin” link that has just appeared:
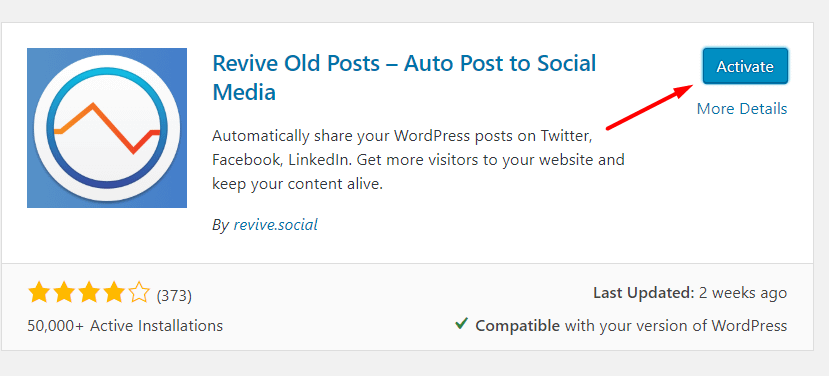
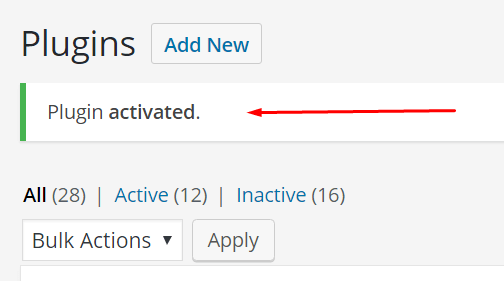
It’s done! The plugin has been activated, and WordPress will let you know about this fact through a small note at the top of the page:
How to install a premium / paid WordPress plugin
The process of how to install a WordPress plugin that’s premium or paid is a bit different. Purely because premium plugins are not available in the official plugin directory – the one you can access via the search option in your wp-admin panel.
1. Get the plugin archive
The first thing you need to do is somehow obtain the plugin itself. This step you need to handle on your own. Most commonly, this involves going to a marketplace or a plugin store, and buying a copy of the plugin from there.
Long story short, as a result of your purchase you should have the installable plugin file saved as a ZIP archive. Like so:

I for example, have our own Feedzy plugin to experiment with here.
2. Go to “Plugins” in your WordPress dashboard
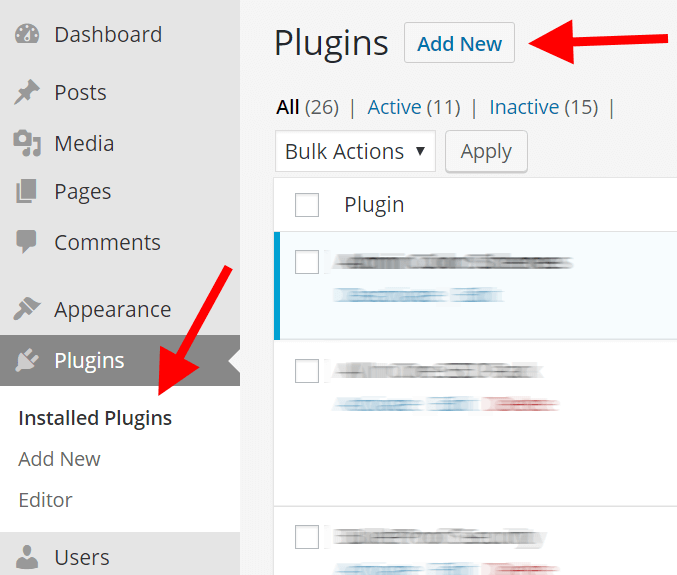
Once you have your ZIP file, go back to your WordPress wp-admin panel, click on “Plugins” in the sidebar menu, and then on the “Add New” button:
3. Upload your plugin archive
From there, click on the “Upload Plugin” button visible at the top:

On the next screen, you will be able to upload your plugin’s ZIP file straight to your WordPress. Just select the ZIP from your desktop and confirm the upload by clicking on “Install Now.”
4. Activate the plugin
When WordPress finishes doing its magic, you’ll only need to activate the plugin:

After doing so, the plugin is online and you can start using it.

If you have any questions, feel free to submit them in the comments below.
